Get Your WordPress Site Up and Running in a Few Easy Steps
Many business owners believe that the best way to communicate their business is through the use of social media. While sites like Facebook, Twitter and LinkedIn can help get the word out about the products and services you offer, nothing communicates what your business or brand is all about like a website.
Nothing conveys your message to potential customers like your own website. Your website serve as your home base – a place where people can go to learn more about you and what it is you have to offer anytime of the day. A website can actively work for you 24 hours a day, 7 days a week, 365 days a year.
The biggest issue when it comes to choosing a website over social media sites, is one of control. Having your own site allows you to completely control what you say, when you say it and how often you say it.
Unfortunately, many business owners, especially small businesses owners shy away from having their own website because they feel that it’s simply too expensive to have one created or far too hard to build a site themselves.
In case you haven’t heard, it has never been easier or cheaper to build your own website, than in this day and age. With products such as WordPress, you can have your site up and running in no time and you won’t need to spend a fortune to do so.
What Exactly is Web Hosting?
To jump start your web presence you need web hosting. This is simply the place where your new website will be stored. But what’s the best hosting service, and where should you go or who should you use? There are many choices and picking the right web hosting company can be confusing. For many of my sites, I use Bluehost.com. They are among the best and were recently named “Best Web Host for Small Businesses“.
Use Our Website Launch Guide to Create Your Own Website!
To help launch your new website, here is a step-by-step guide that walks you through how to get your site up and running using Bluehost.com
Steps Needed to Setup Your New WordPress Website
When it comes to creating a website, there’s no better choice to build a website with, than WordPress! Bluehost makes getting your WordPress website created and out on the Internet a breeze. Bluehost.com is one of the best hosting companies in the world for individuals and small businesses. I invite you to sign up for one of their plans.
To get started, Click Here to get your free domain (or transfer your current one) and signup for hosting with Bluehost, and then just follow the steps below:
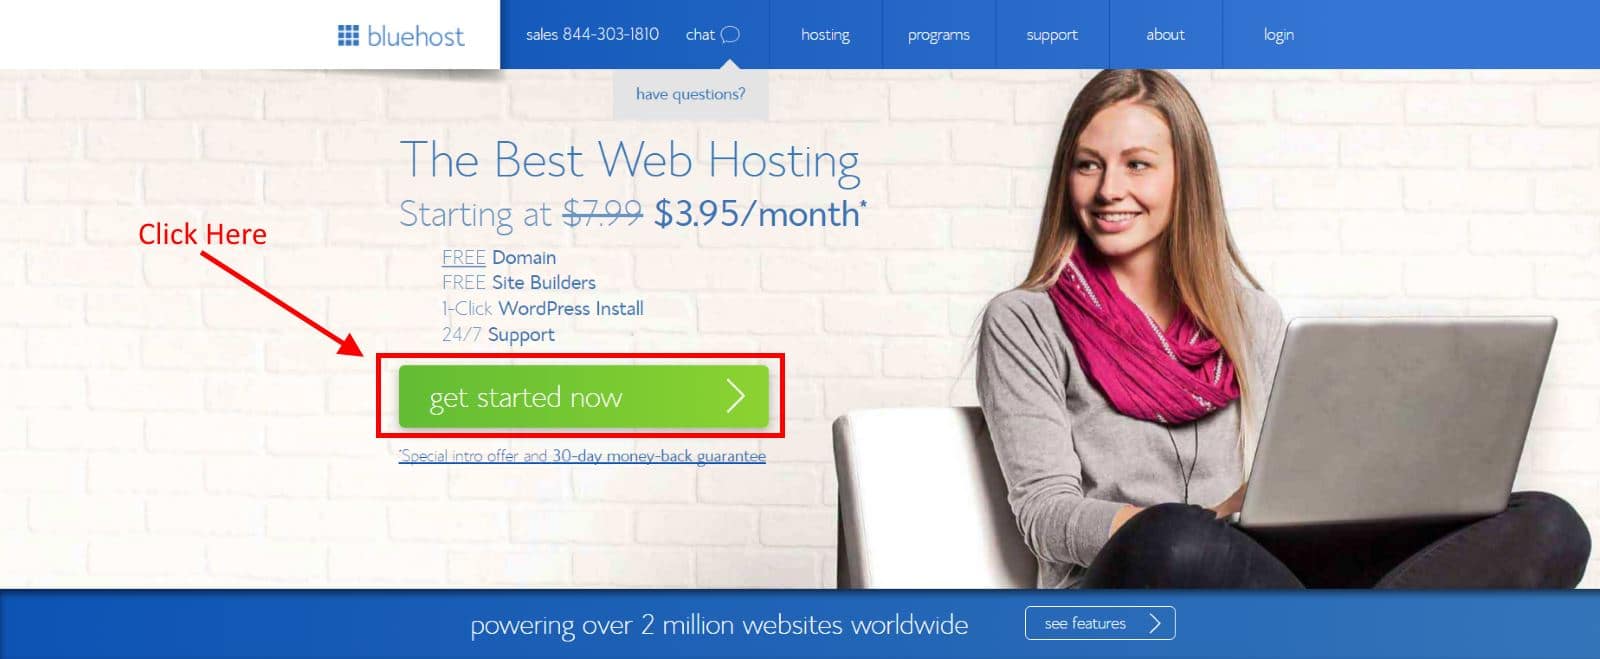
Step 1
1. Click the “get started now” button
Step 2
Select the plan you think is right for you. Most will find that the “basic plan” is more than enough for them.

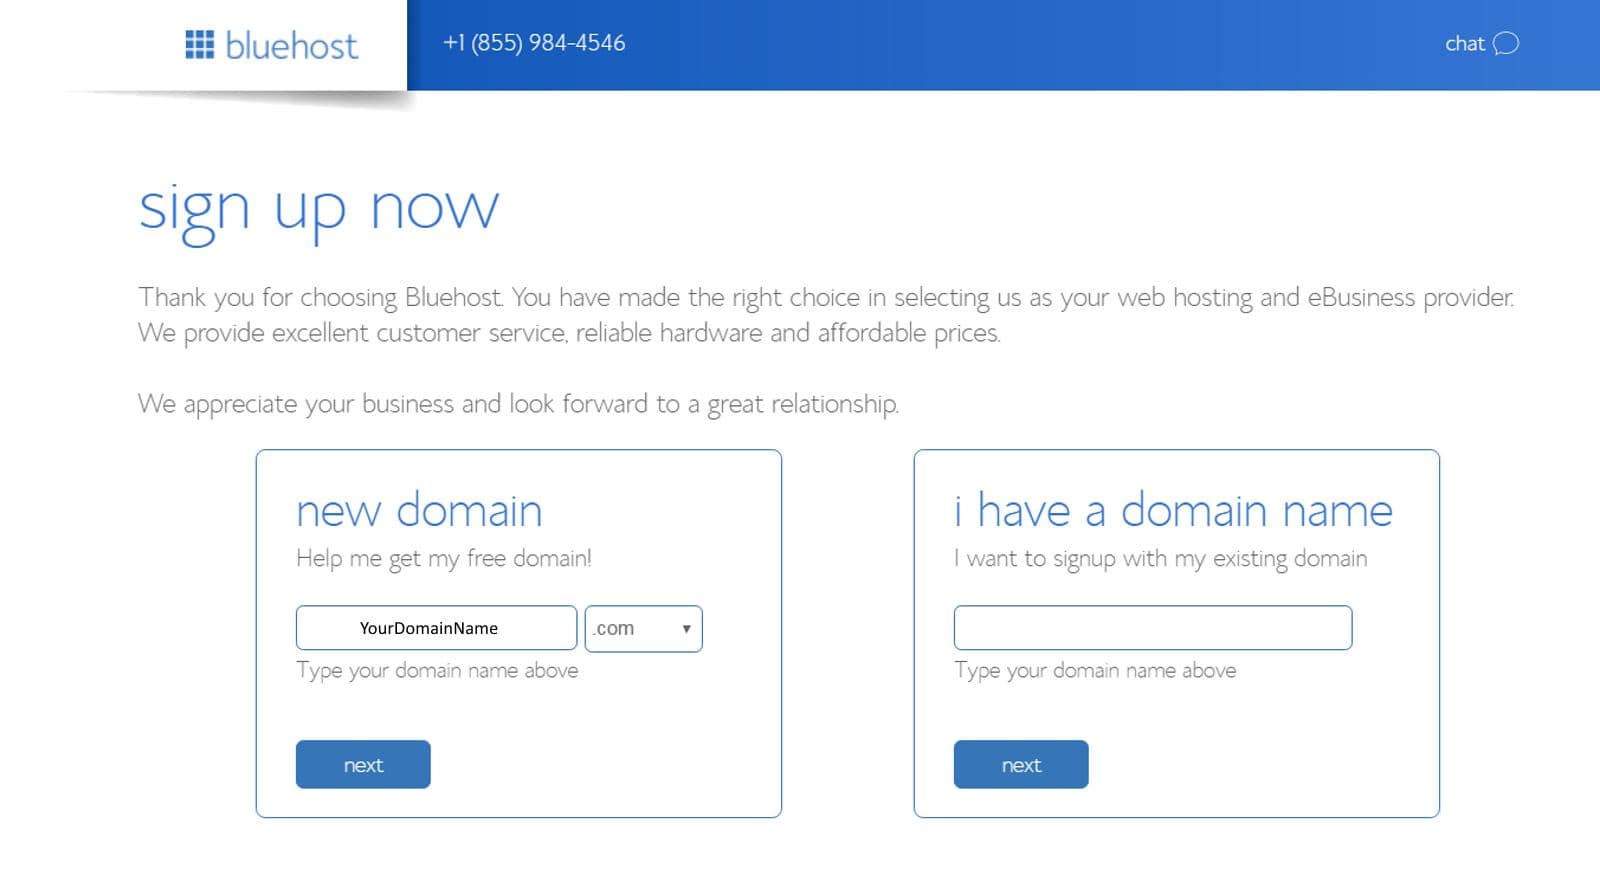
Step 3
2. Enter a new domain name in the “new domain” box or an existing domain name in the “i have a domain name” box if you already have an existing one. Then click the “next” button. This process will verify that your new domain name is not already being used. If it is in use, you will need to type in a different name until you find one that isn’t taken.
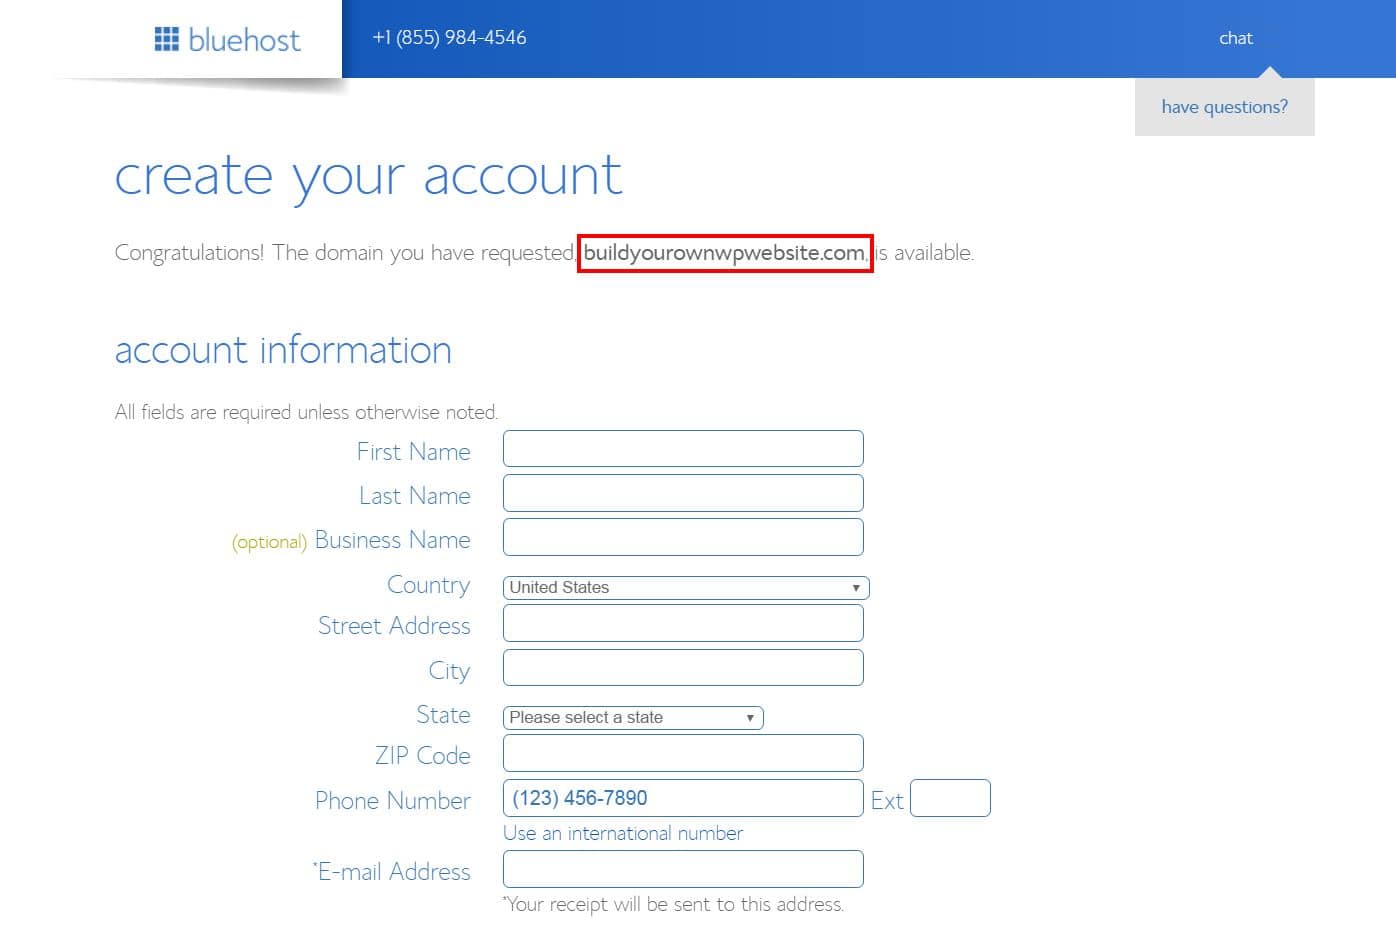
Step 4
You are then prompted to create an account. This is where you pay for your order and hosting plan. You will need to enter the following:
- Account Information
- Hosting Package Information
- Payment Information
After accepting and confirming the “Terms of Service” you must press the “Submit” button.
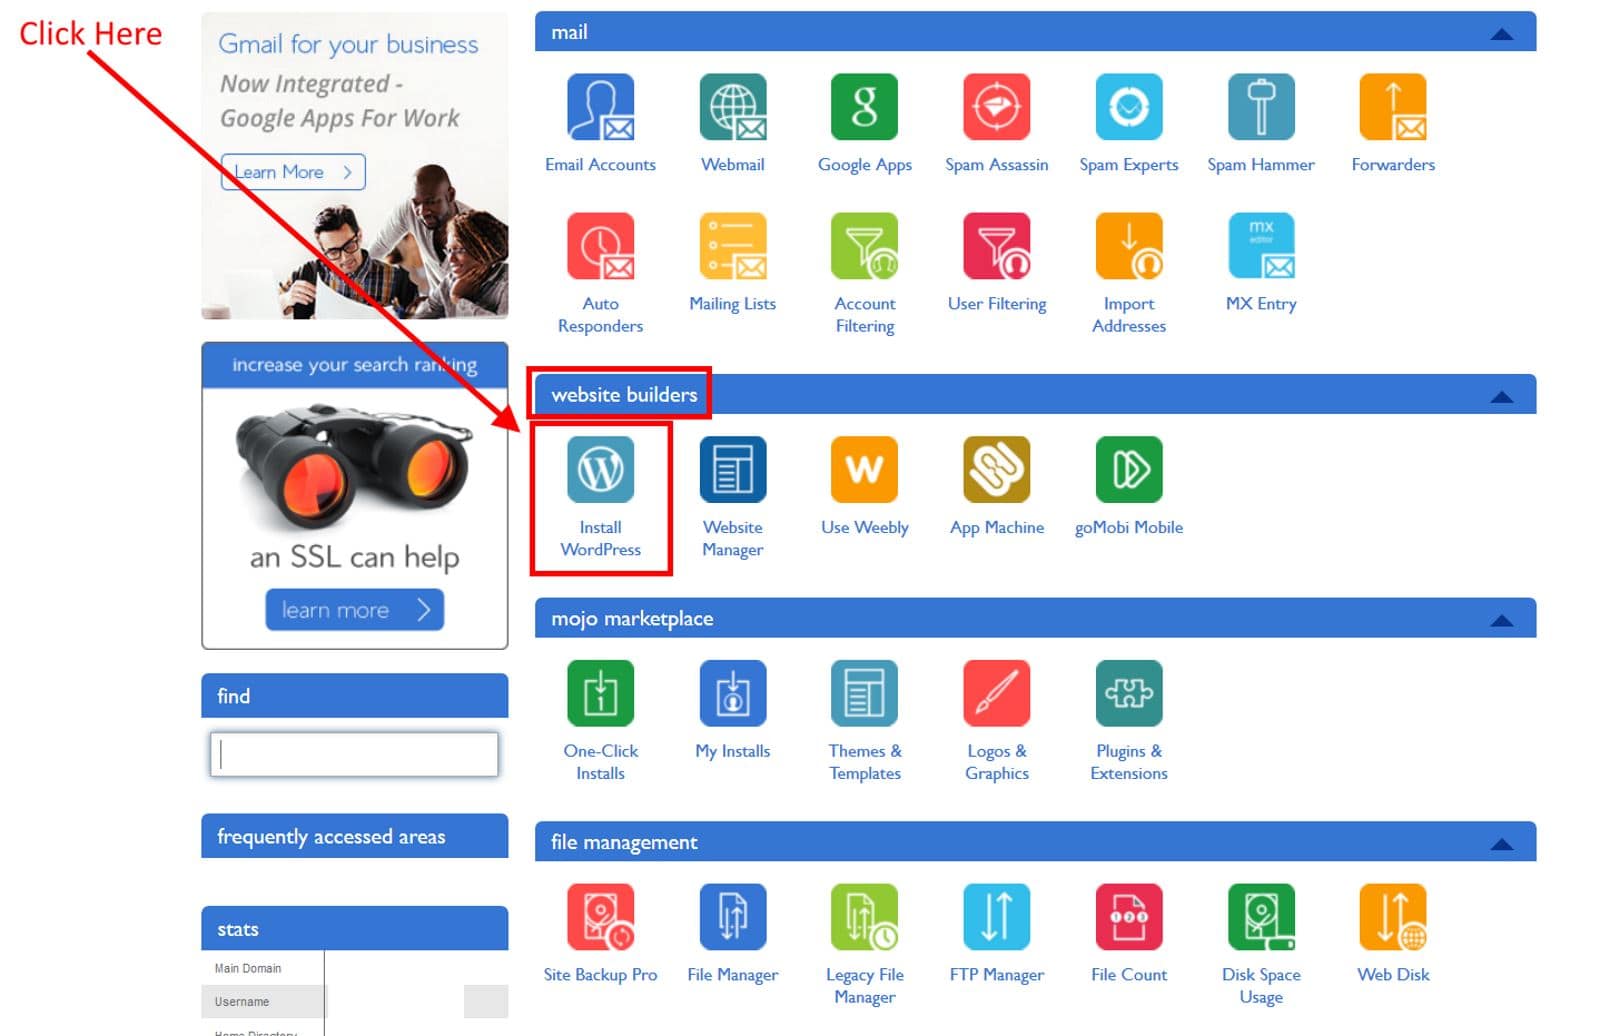
Step 5
You will get a confirmation email from Bluehost. The email will contain your login information. You then need to log into Bluehost, where you’ll be taken to your Bluehost dashboard (a.k.a. cPanel) where you can install WordPress by clicking on the “Install WordPress” icon under the “Website Builder” section.
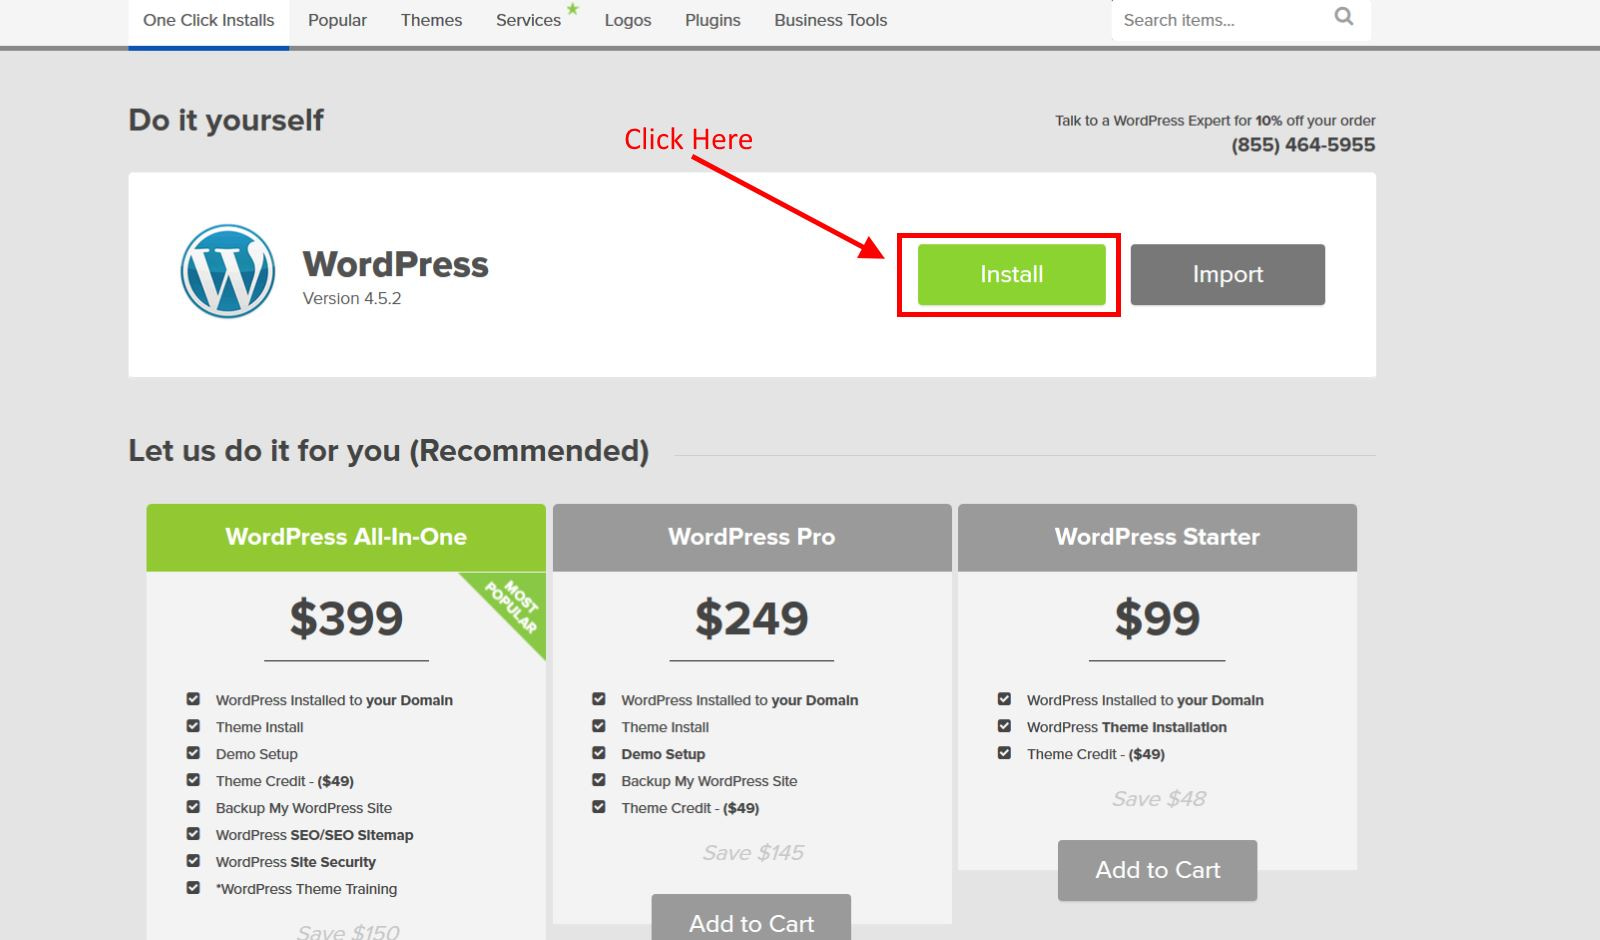
Step 6
Click the “Install” button
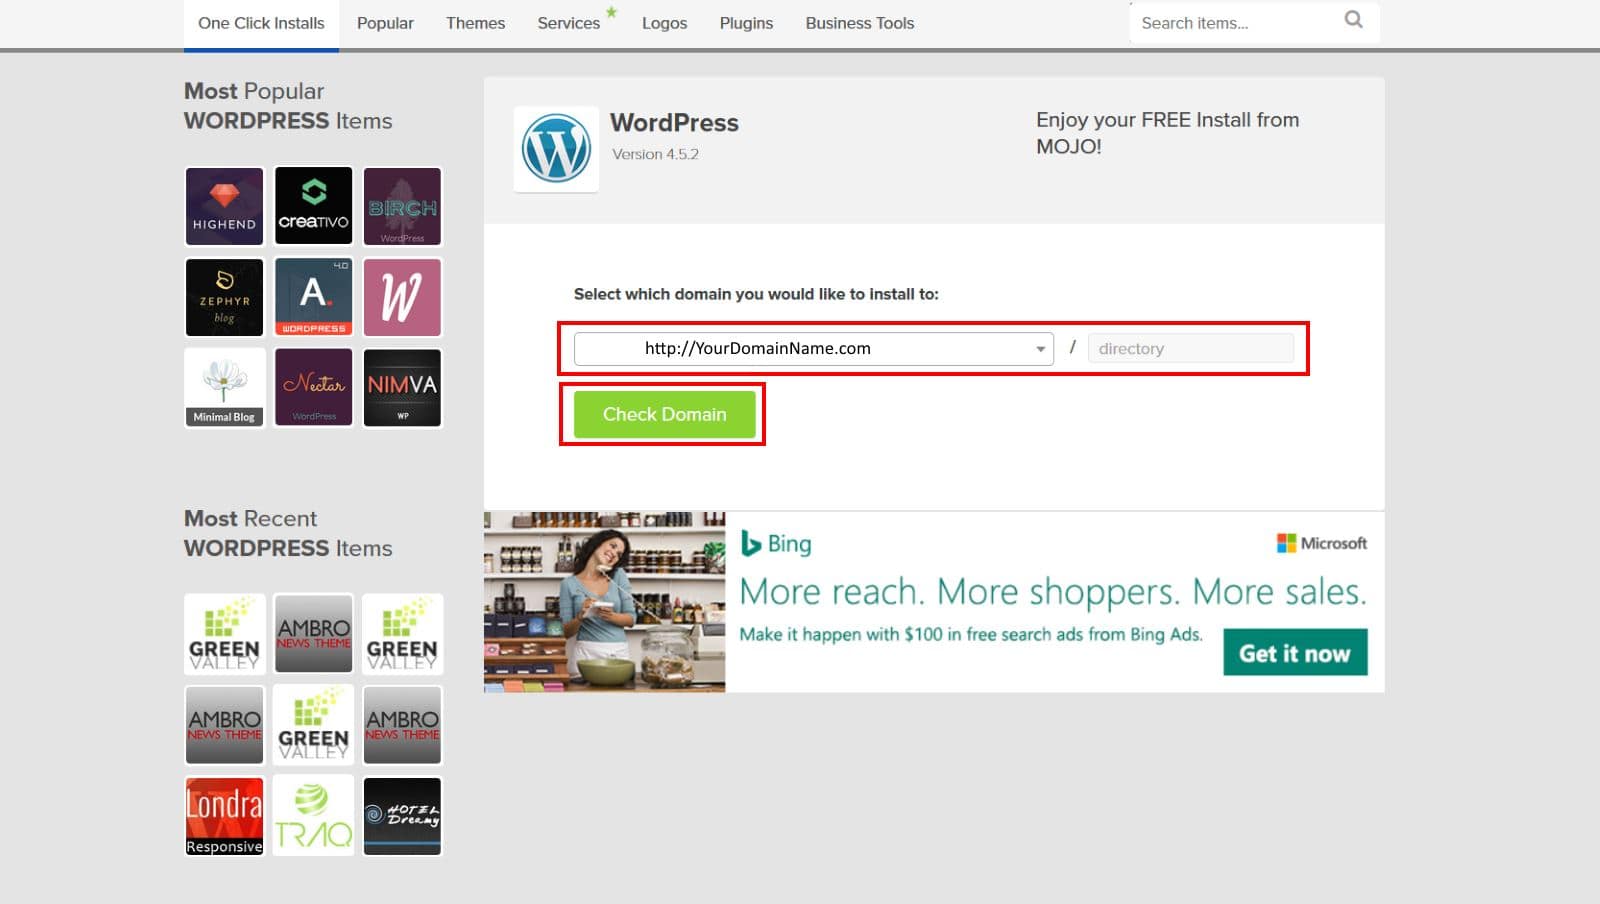
Step 7
This step performs a system check on your domain and sets the stage for installing the latest version of WordPress for you.
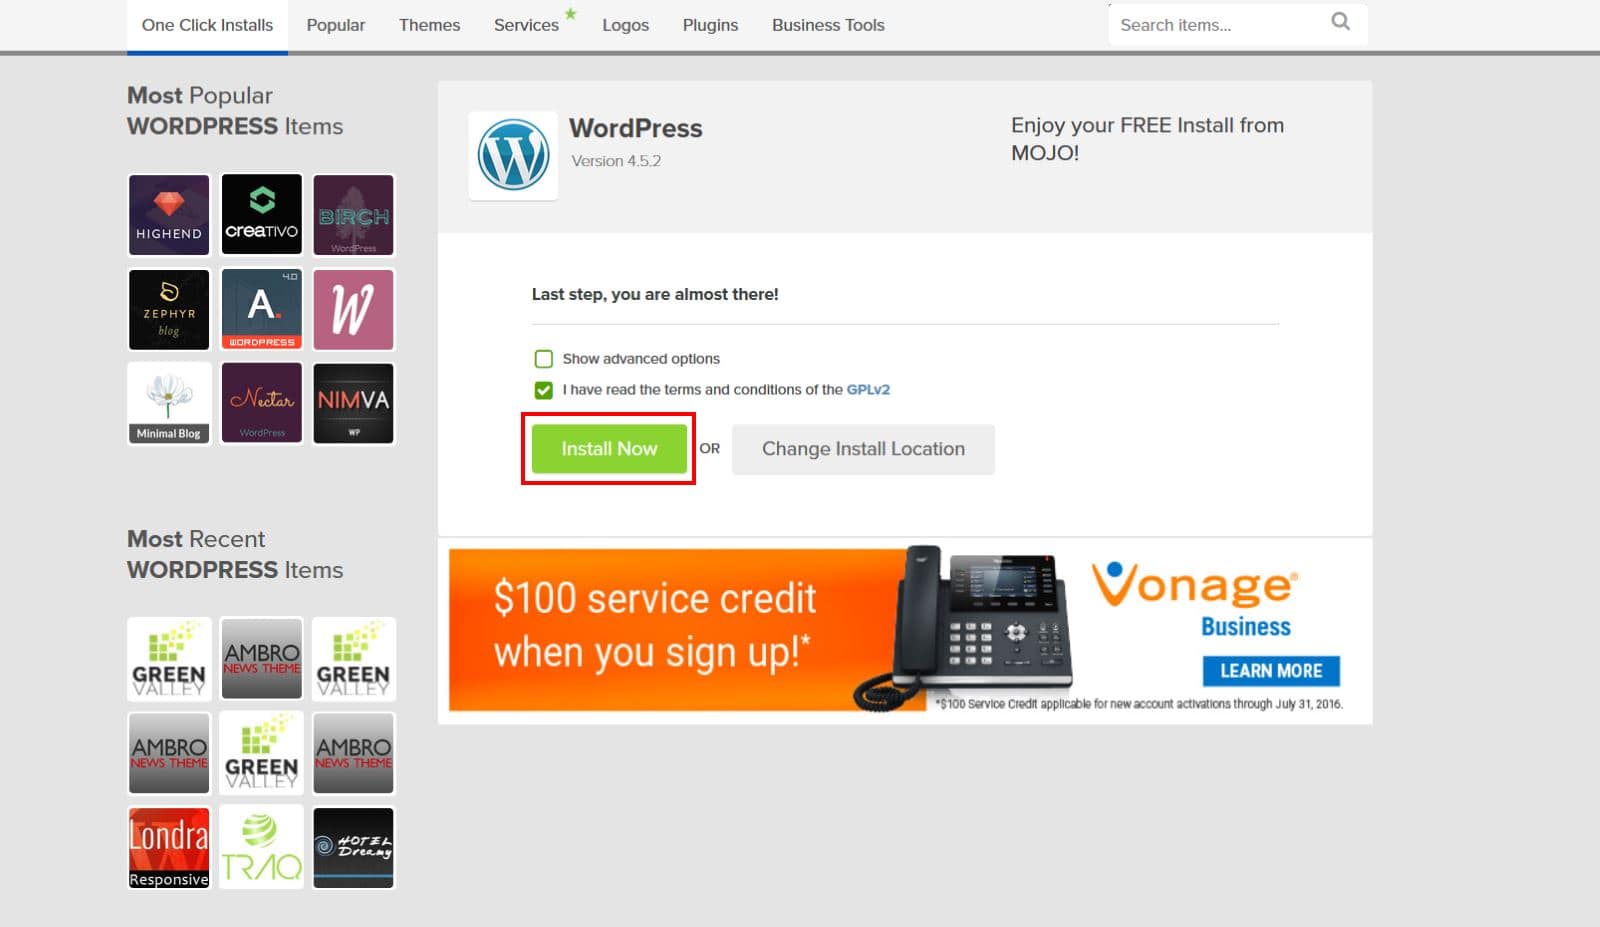
Step 8
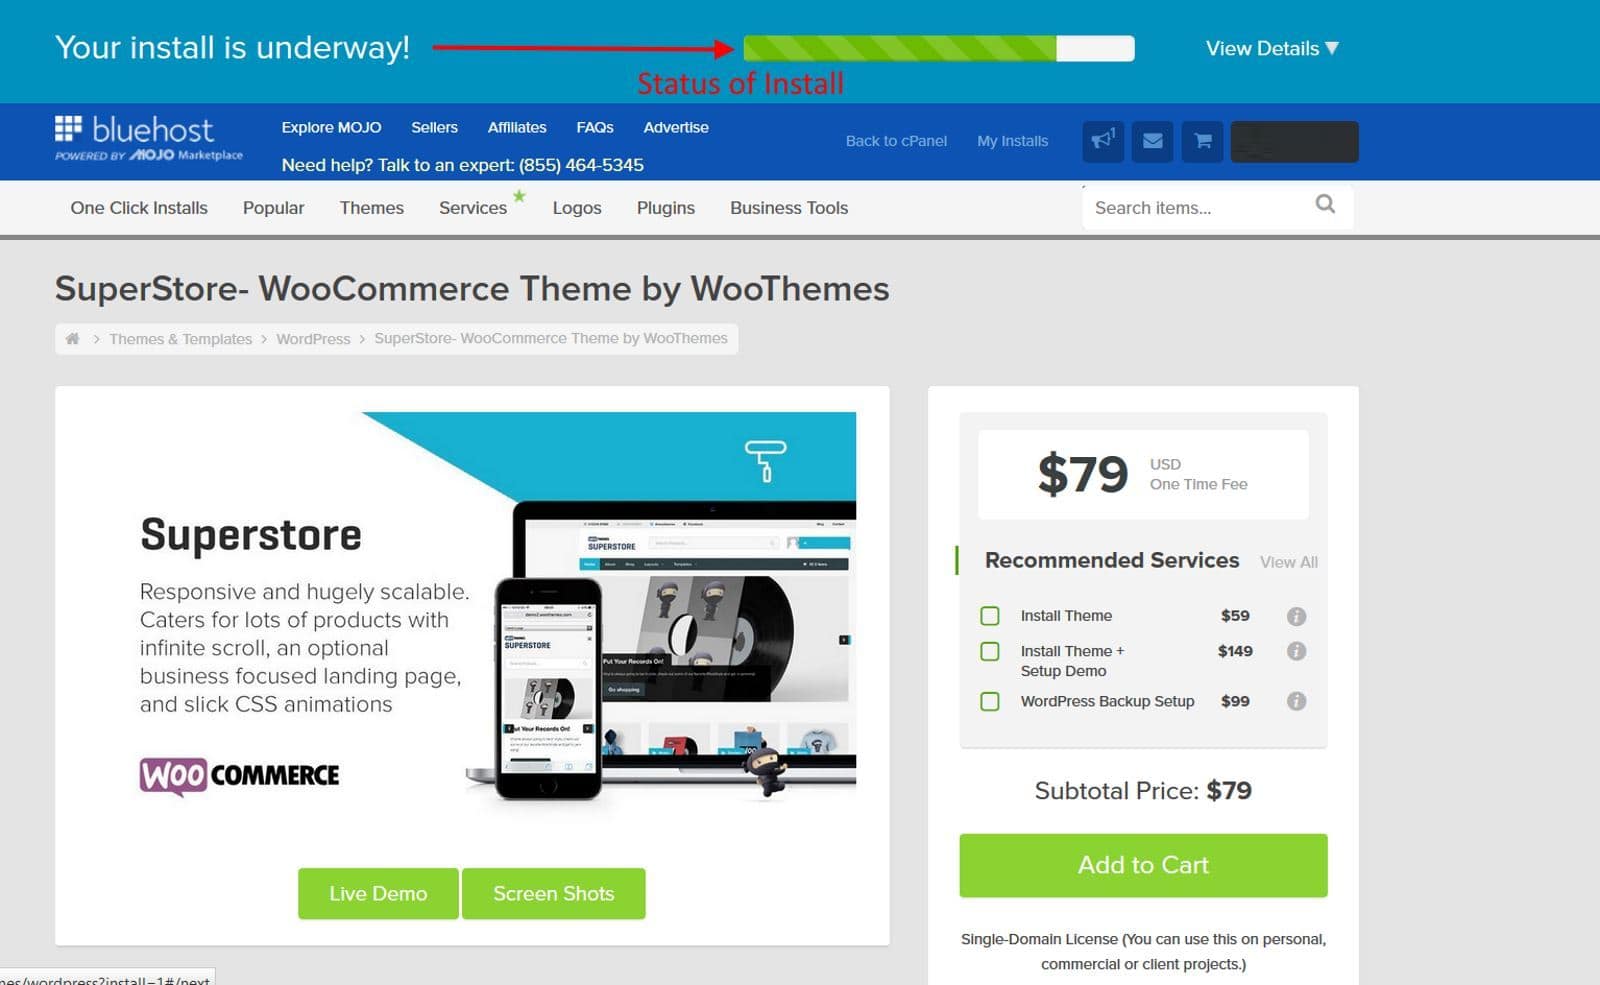
Clicking the “Install Now” button starts the installation process. Note: During this process you can make additional customizations, such as creating your own password. I recommend allowing the installation process to generate your password it will be a very strong and secure one.
This screen shows the progress of your installation
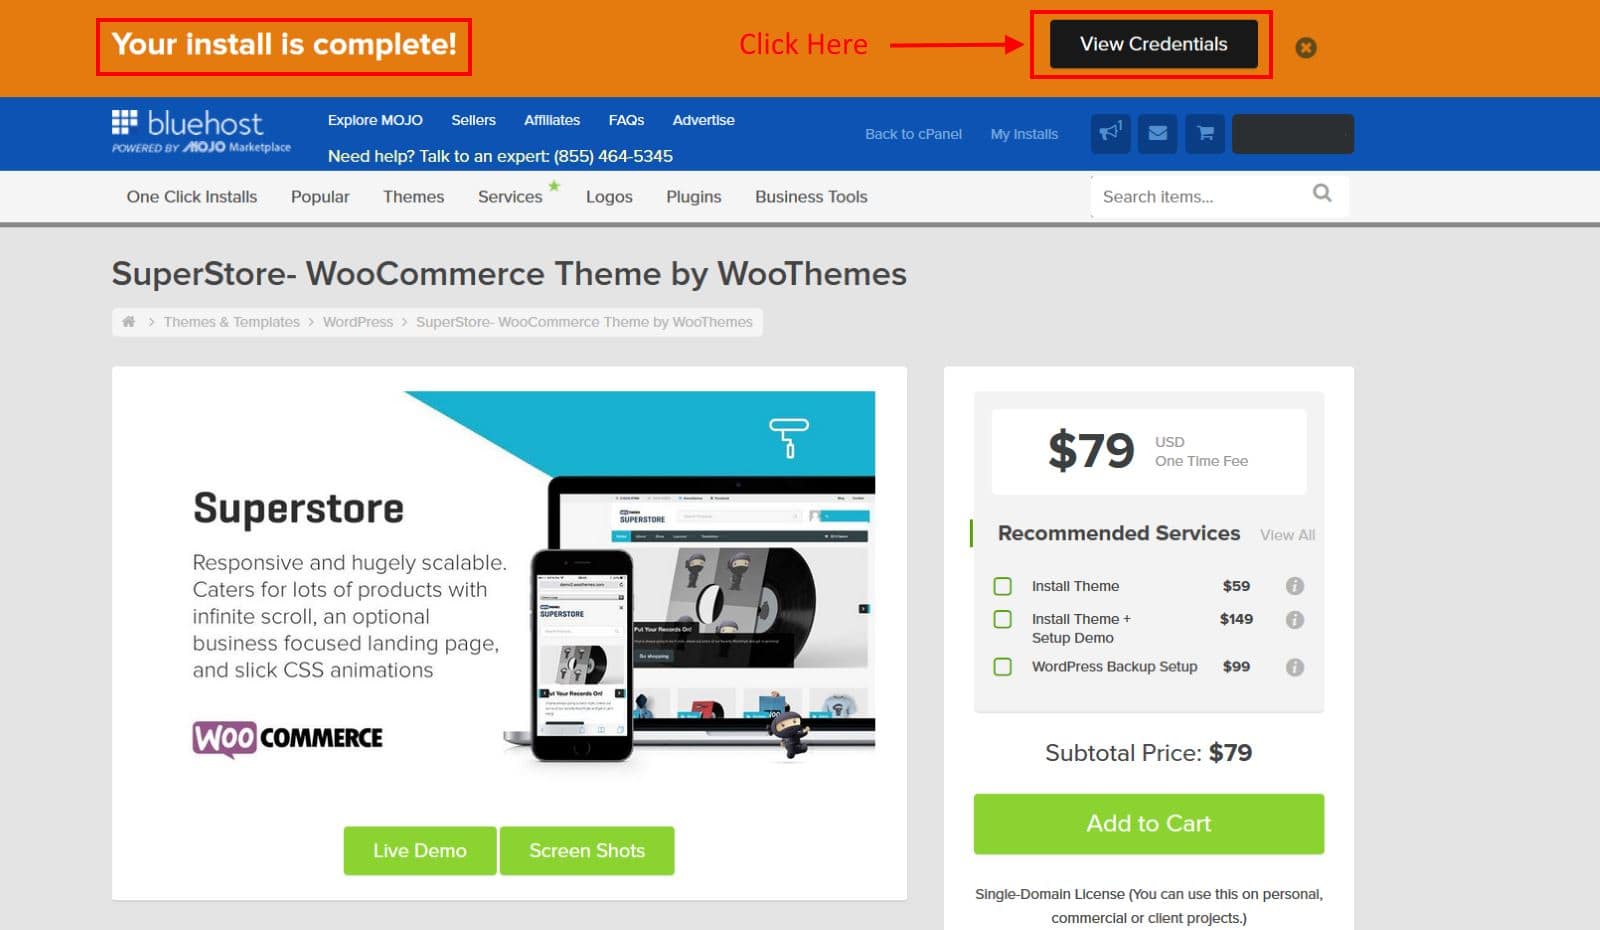
Step 9
This screens shows that your installation is finished. You now need to click the “View Credentials” button so see your username and password. You will need these to log into your “WordPress Admin Dashboard“. Note: This information will also be emailed to you.
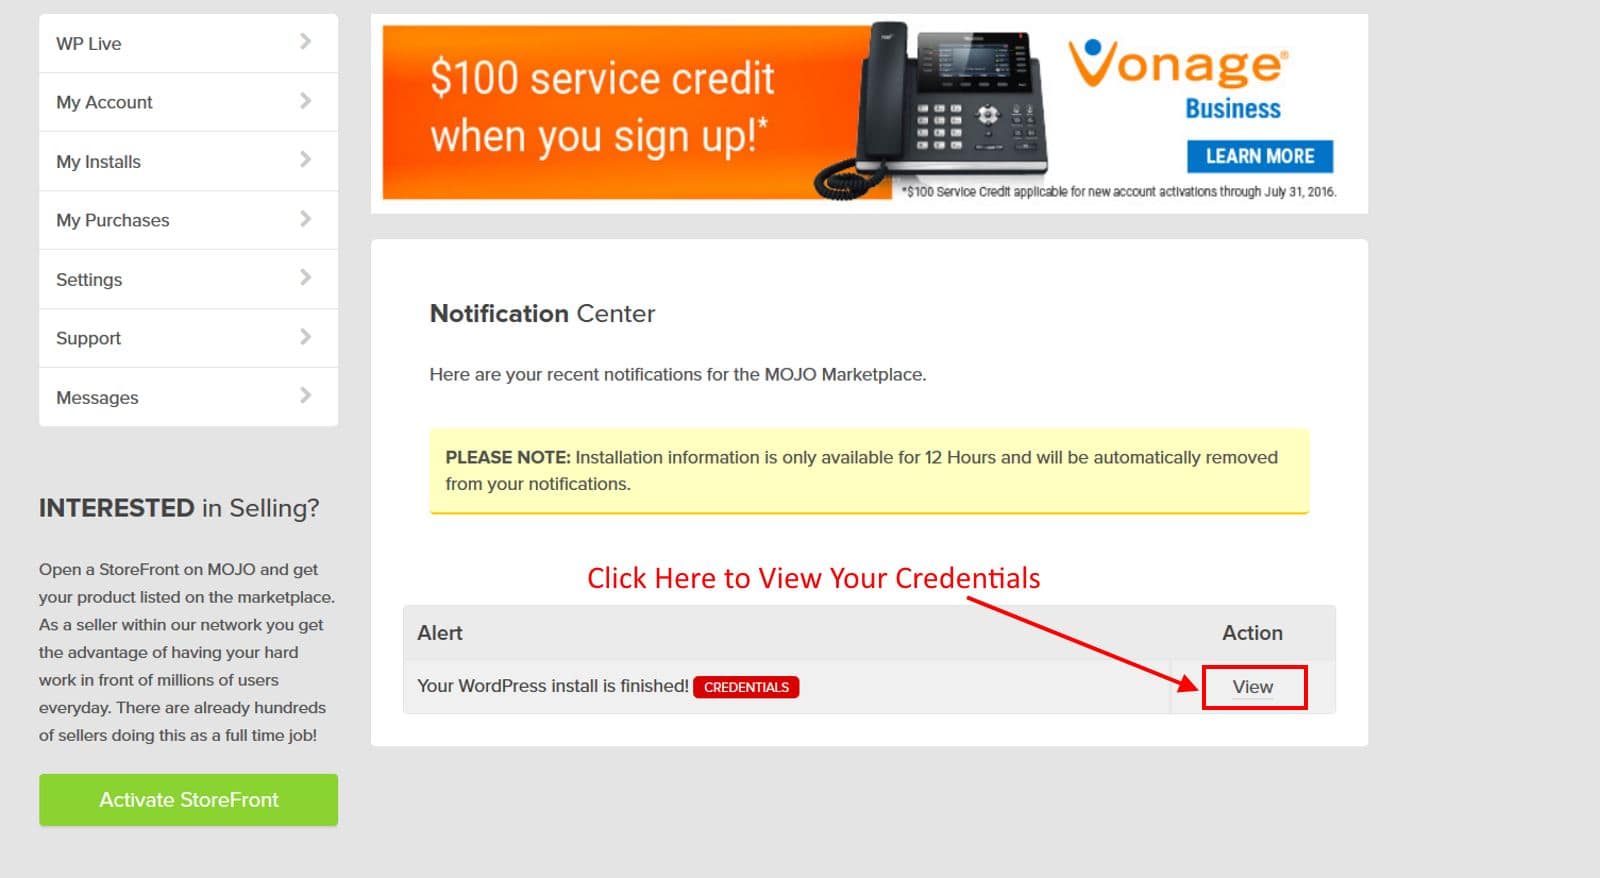
Step 10
You will now be taken to the “Notification Center”. Click the “View” button to see your login information.
You will now be shown the following information:
- Website Address (URL)
- Admin URL
- Username
- Password
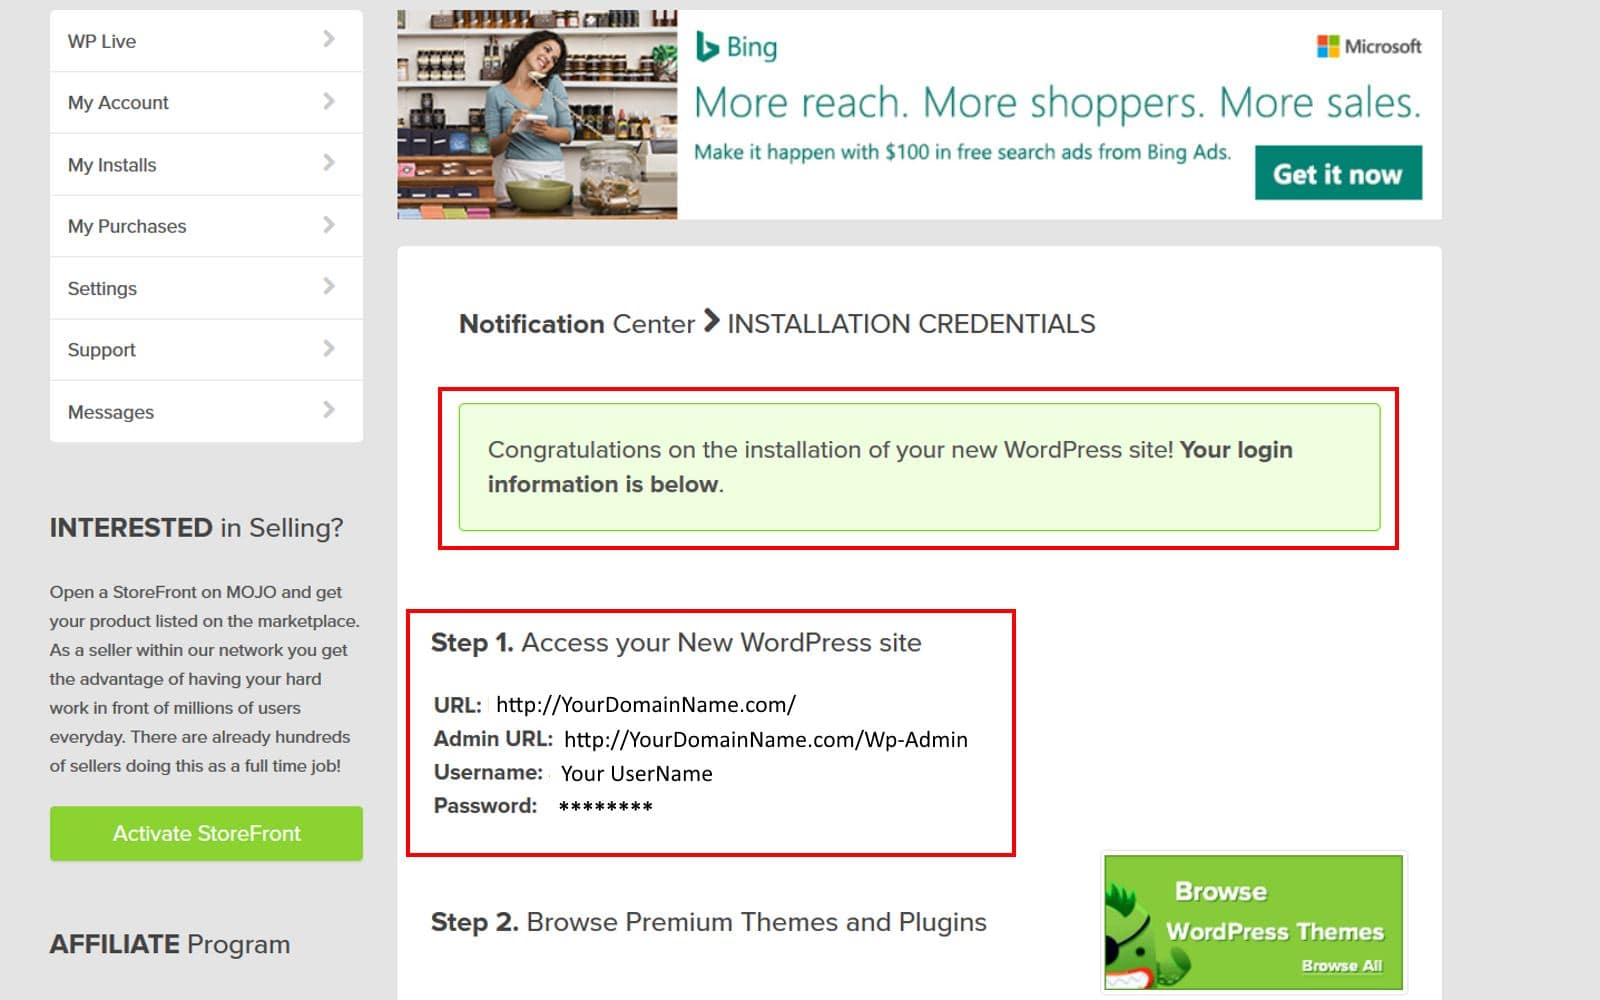
You can now close down these screens and close out of the install process. If you like, you can click the “Admin URL” and you should be taken to the main login screen (below).
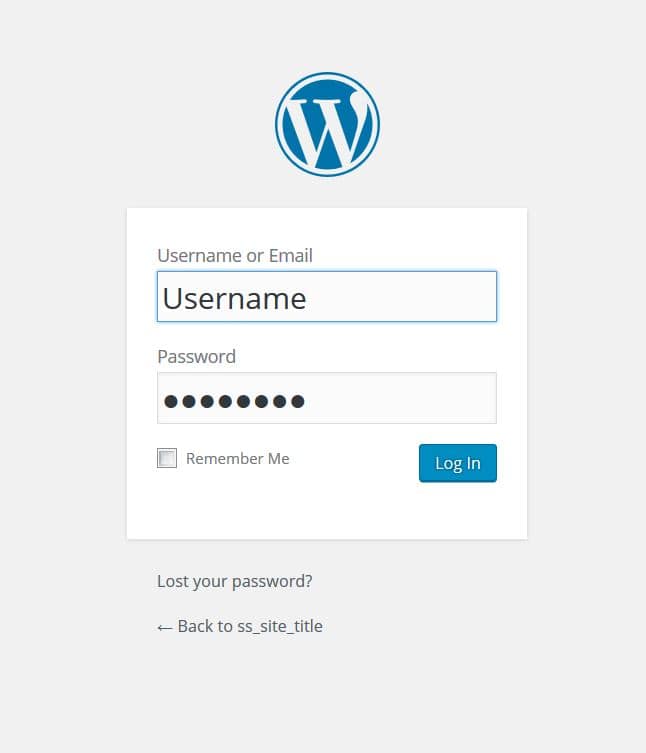
Step 11
Use your user name and password to access the WordPress Admin Dashboard.
That’s It! You’re Done! Congratulations!
To learn more about how to use WordPress, including creating pages and many other tips, visit our WordPress Tutorial Page
Create Your Own WordPress Website!
Click the button below to get started.
